C:\Users\ADSyncxxxxx$\AppData\Local\Microsoft\Microsoft SQL Server Local DB\Instances\ADSync2019
or
C:\Windows\ServiceProfiles\ADSync\AppData\Local\Microsoft\Microsoft SQL Server Local DB\Instances\ADSync2019
This issue should not occur starting from version 2.1.1.0 of MS Azure AD Connect. Read the Microsoft doc below to perform a manual in-place upgrade of Azure AD Connect.
In Microsoft 365 / Exchange Online, to connect a soft deleted mailbox, you have need to use the cmdlet New-MailboxRestoreRequest to restore the mailbox to another user.
Get-Mailbox -SoftDeletedMailbox | select guid
Get-Mailbox <NewMailbox> | select guid
New-MailboxRestoreRequest -SourceMailbox <GUID> -TargetMailbox <GUID of new mailbox> -AllowLegacyDNMismatch
Azure AD App Proxy allows you to publish an internal website to the internet. It is easy to set up and does not require inbound firewall rules. Traditionally, you would publish a website with the help of a reverse proxy, for example with Citrix Netscaler/ADC, KEMP Loadbalancer or F5.
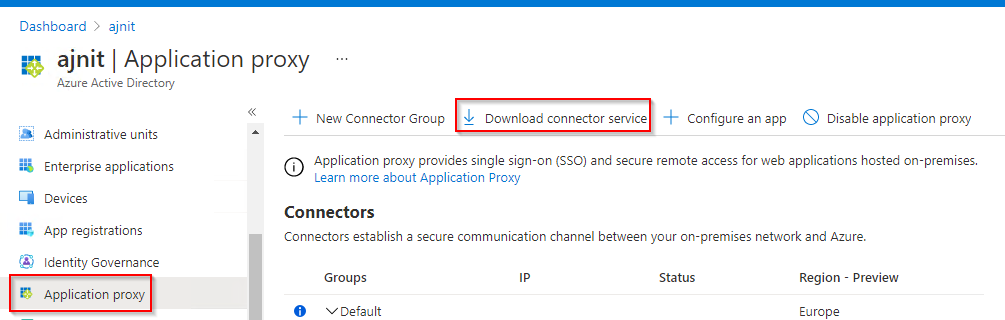
In the Azure AD Portal (aad.portal.azure.com) open Application Proxy and firstly install the software on a server in the corporate network. Domain join is not a requirement, but is needed if you use Kerberos authentication.
You will need to log in with your tenant admin (or a M365 user that has the appropriate role).
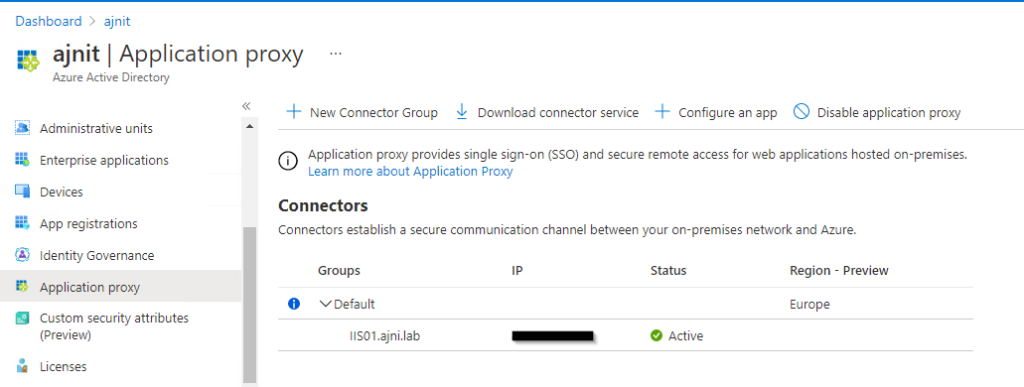
After the installation, you should see the server in Azure AD App Proxy:
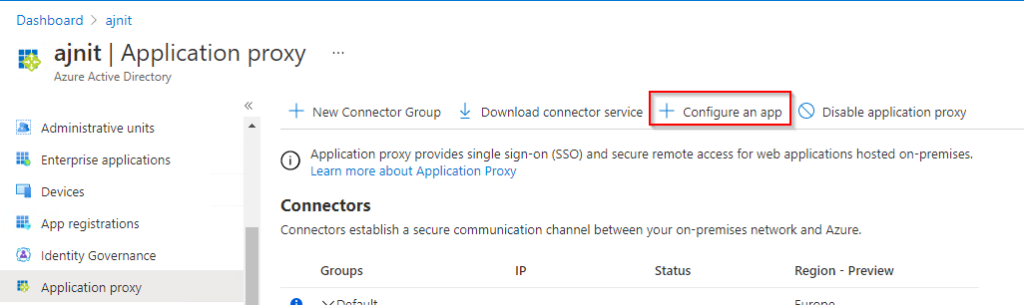
To then publish your site, select + Configure an app
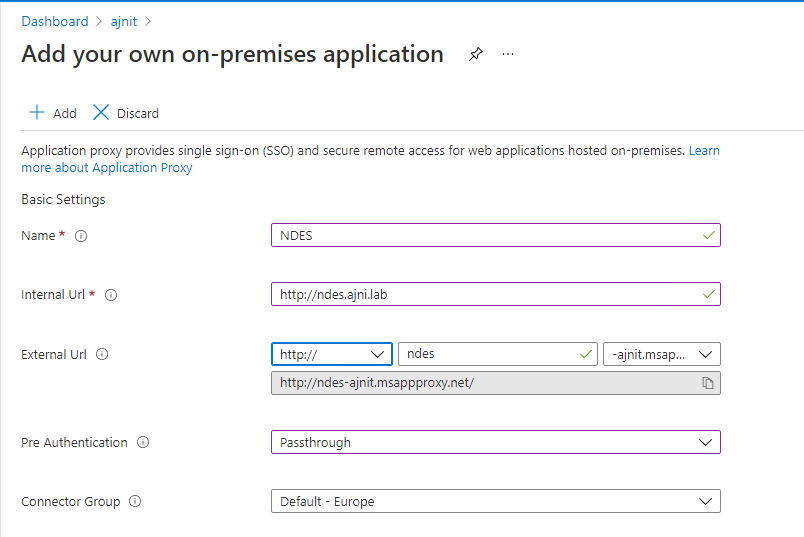
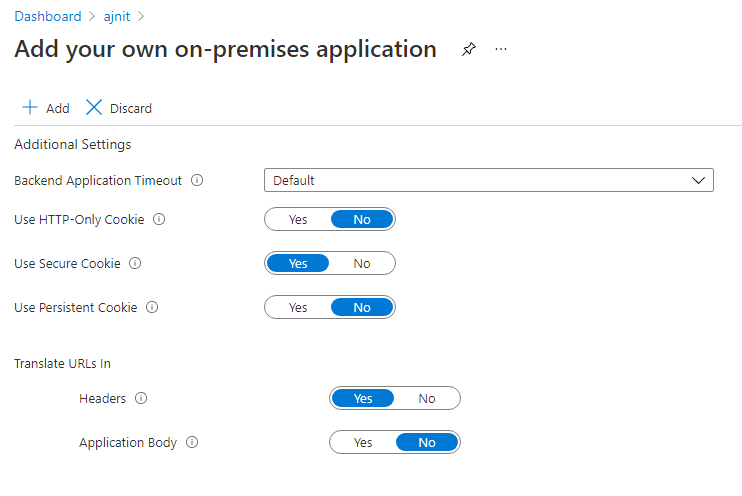
Provide the internal URL along with the protocol (HTTPS or HTTP). You could select Azure AD in Pre Authentication and work with conditional access policies and require MFA for example. This example is using Passthrough Authentication.
Also some basic settings can be changed. To publish the site, hit + Add
After a few minutes, your site should be available:
You can also configure custom domains by verifying your domain(s) in Microsoft 365 by uploading your public certificate with the private key (pfx) and configuring the appropriate DNS record. For detailed information, check out the Microsoft docs below.
If you have the misfortune of having to troubleshoot and repair boot issues on a virtual machine after a physical host crash, these two commands might help you.
First of all, try to get into the advanced settings on boot (it should be the F11 key), or after a while Windows (Server or 10/11) might automatically go into the menu when it cannot boot from disk. Alternatively a Windows ISO image can be used.
Once in the advanced settings, run the good old checkdisk command:
chkdsk /f C:
After completion, restart the VM and check if you are able to boot. If the issue persists, try restoring the registry database (once again through the advanced settings or a Windows ISO). A scheduled task regularly backs up the registry and puts it the folder C:\Windows\System32\config\Regbak.
Restart the VM and check if you are able to boot into Windows. If you still have issues, you should consider restoring from a backup (it sucks but sometimes it is unavoidable).