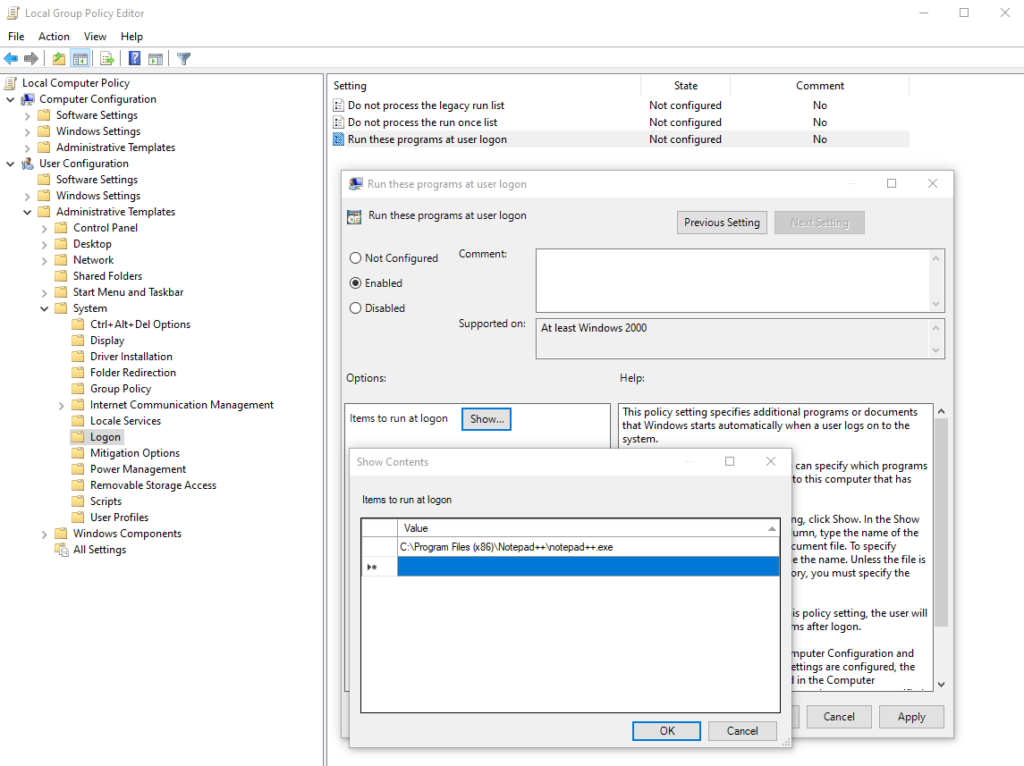
You can easily run one or multiple programs at logon without messing with the Registry by using Group Policy Object (GPOs).
Under User (or Computer) configuration > Administrative Templates > System > Logon > Run these programs at user logon you can insert the path of the executable. Very clean and straight forward.
You probably have stumbled upon this common problem: When logging into a Domain Computer with a Domain user, this error appears: The trust relationship between this workstation and the primary domain failed.
What does it mean? Well, it basically means that the Domain Computer cannot authenticate against Active Directory, because the Computer Account password on the workstation is not valid anymore (this can occur when using Sytem Restore or when restoring from a backup).
How do you solve this issue? Pretty easy. Just remove the computer from the Domain and re-join. That works, but there is a cleaner and faster solution with one line of PowerShell code:
Active Directory Certificate Services is the Windows implementation of Public Key Encryption (PKI). ADCS is needed whenever you are hosting a web server that needs to encrypt data over the wire. Instead of buying a public certificate, you implement your own trusted internal Certificate Authority (CA), deploy the Root Certificate to your clients through GPO, and then you can create as many web server certificates as you want.
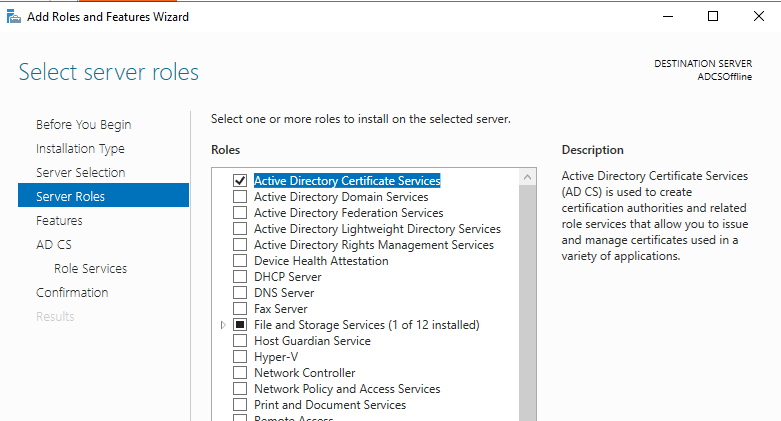
My deployment consists of two servers with Windows Server 2019. The first server will be the Offline Root Certificate Authority (offline because it will be offline for most of the time) and will not be part of the domain. The second server will be a domain member and will be the Issuing CA.
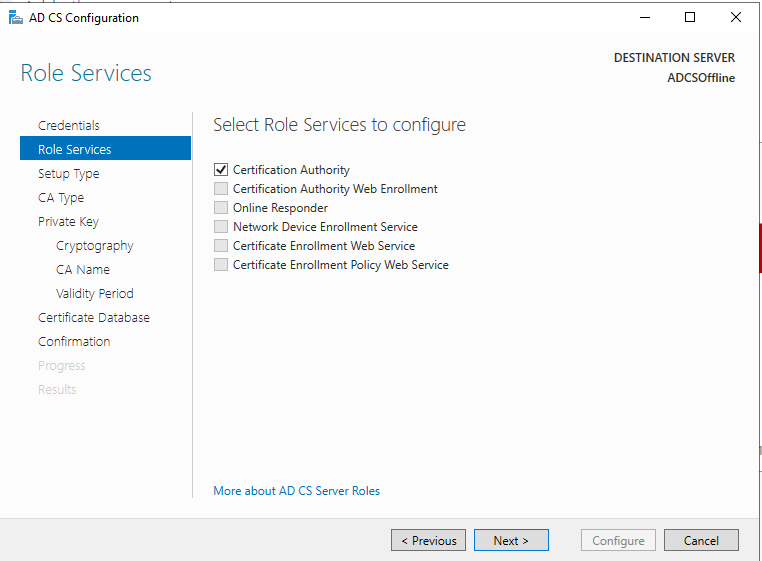
So on the first server, install the ADCS role on the Workgroup server in Server Manager:
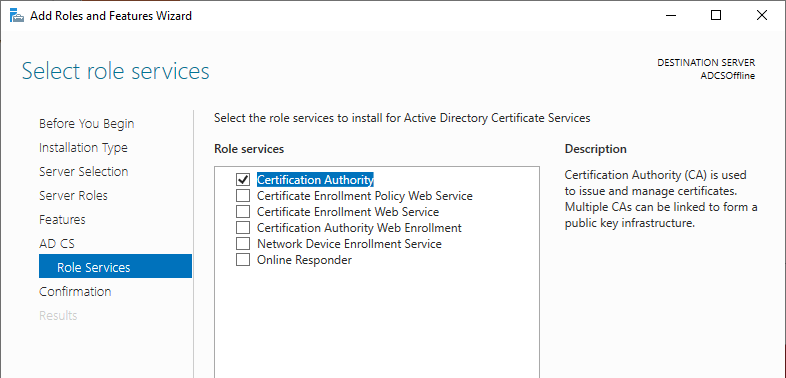
Under Role Services, select Certification Authority.
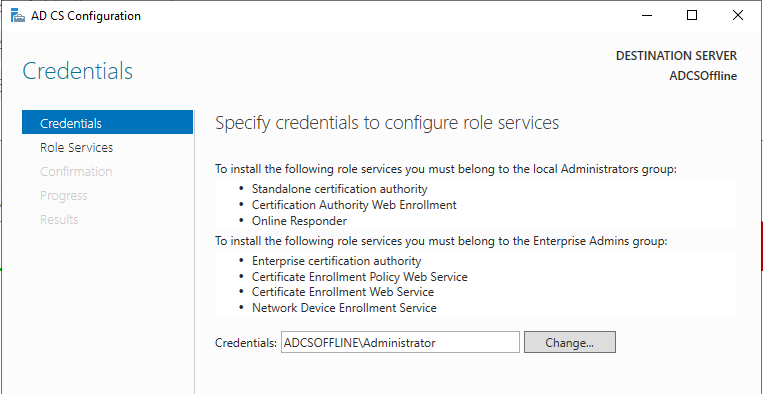
After the role installation, proceed with the configuration.
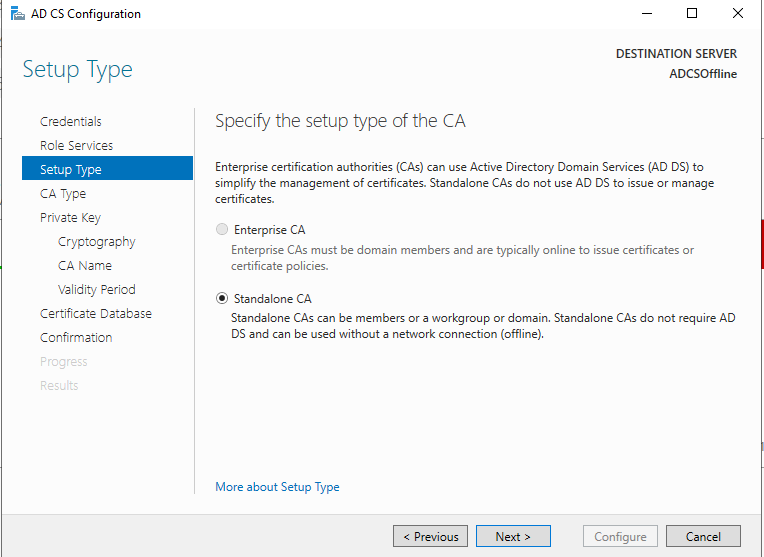
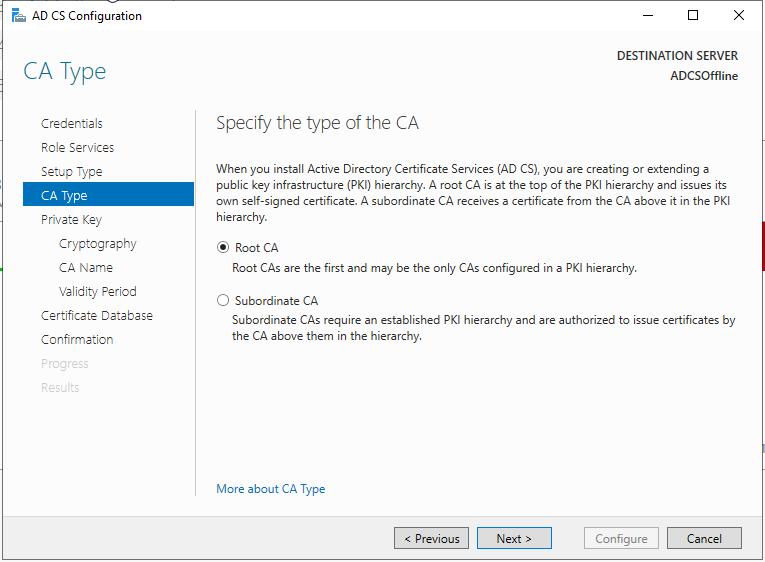
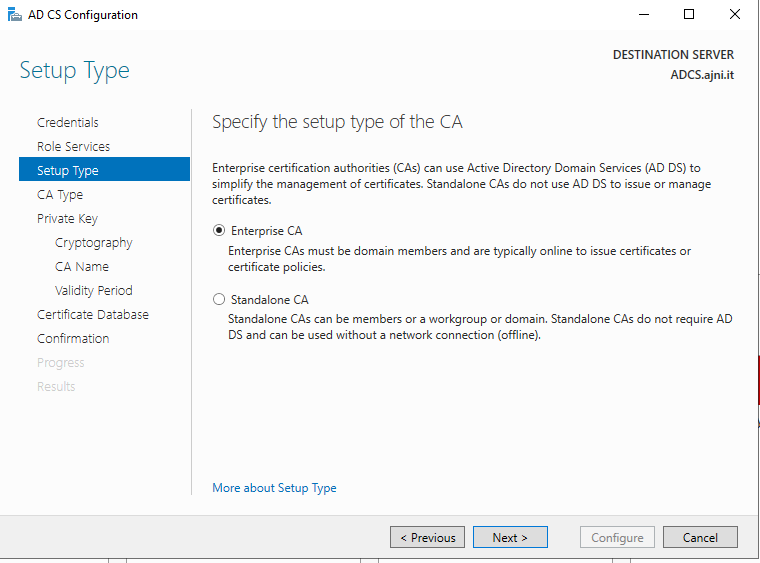
This server will be the Standalone Root CA, the domain member will be an Enterprise Subordinate CA.
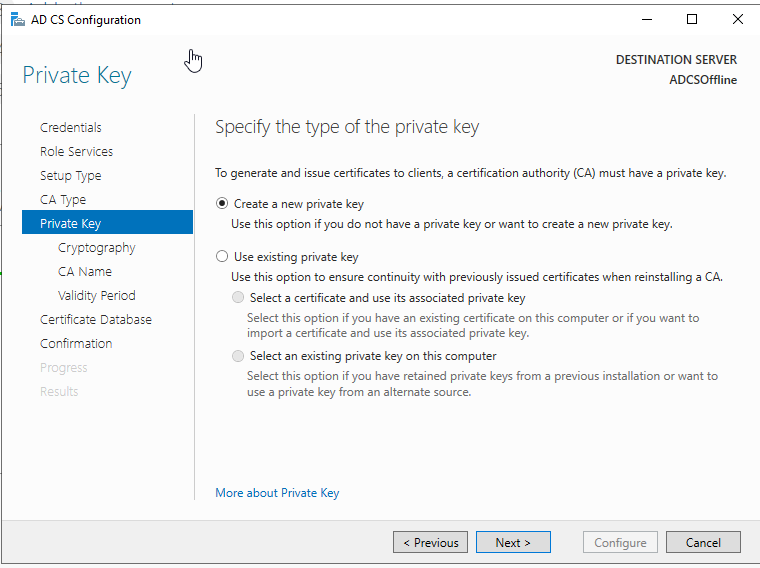
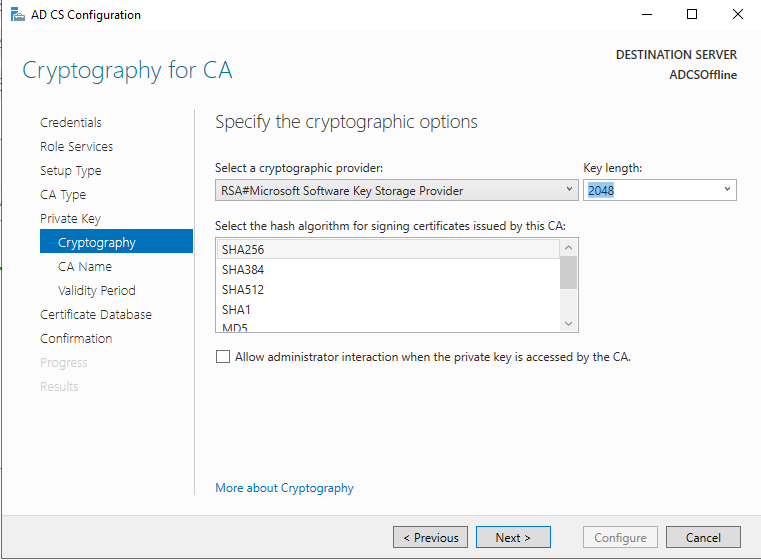
Create a new private key. SHA256 should be just fine for the hash algorithm with a key length of 2048.
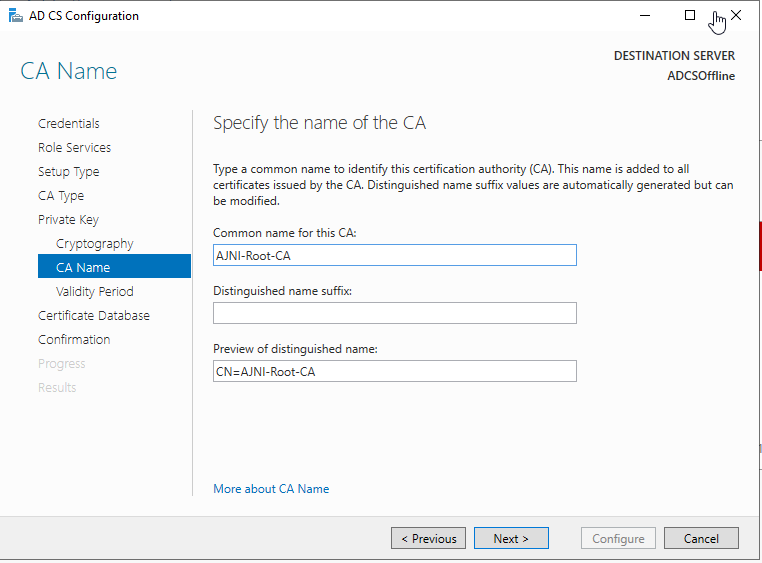
Give the CA a name.
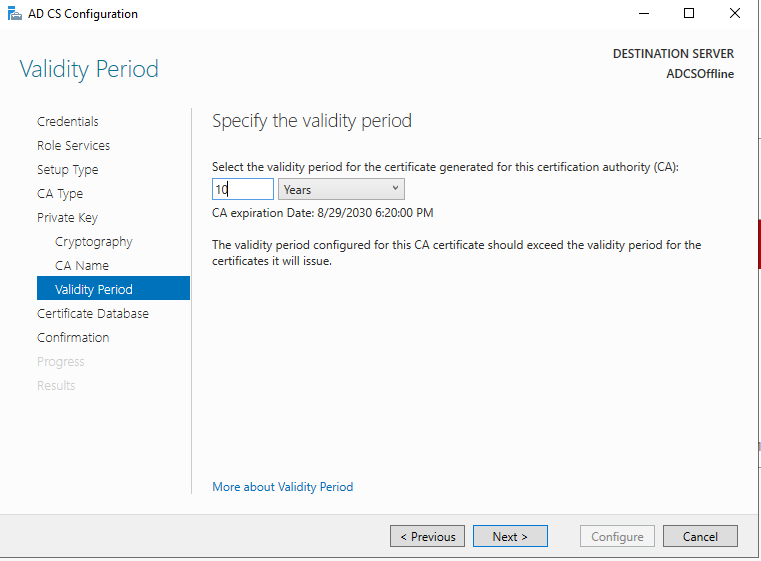
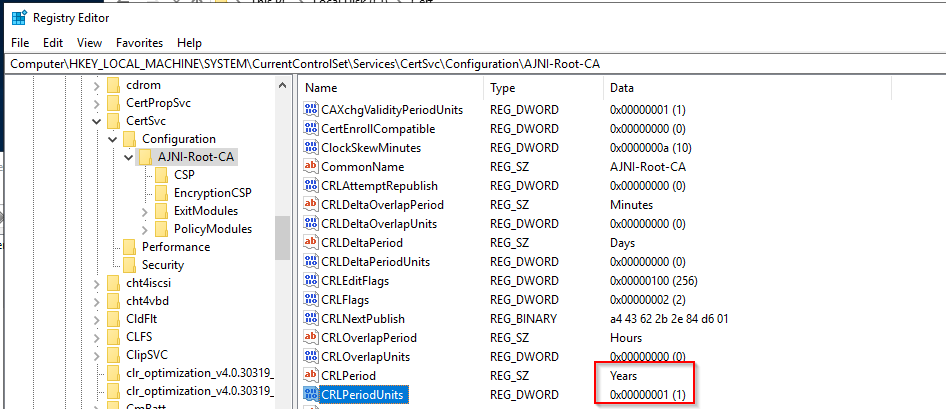
The offline Root CA should be valid for 10 years. The online CA for 5.
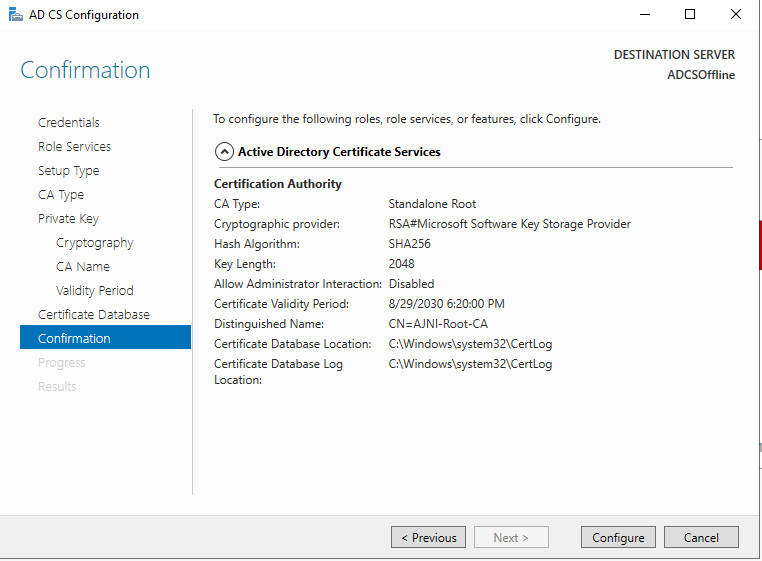
Here a recap of the settings we chose.
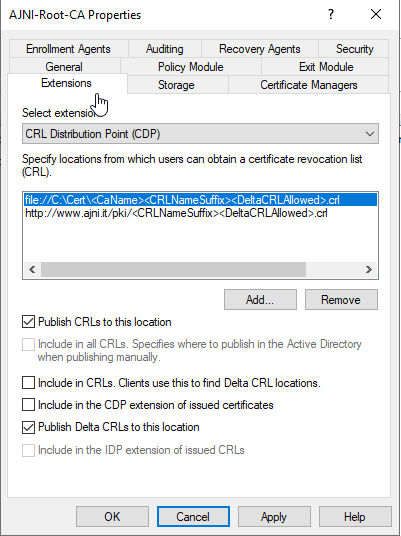
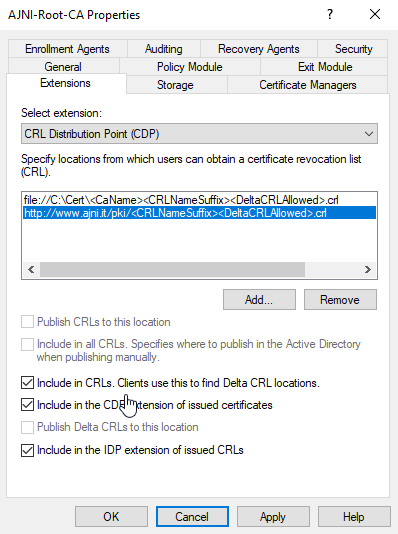
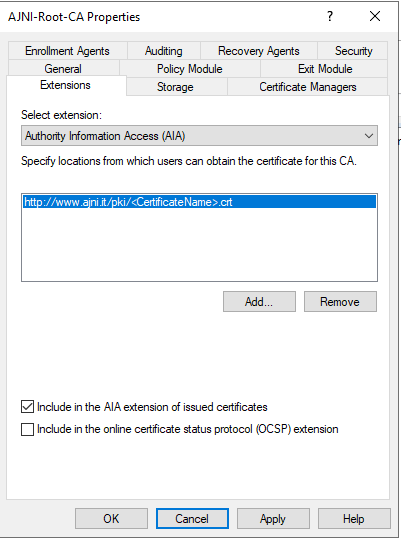
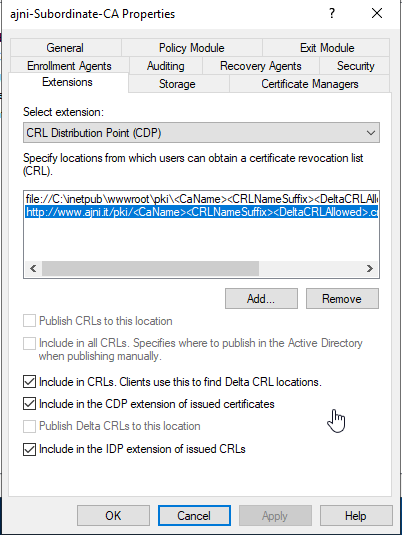
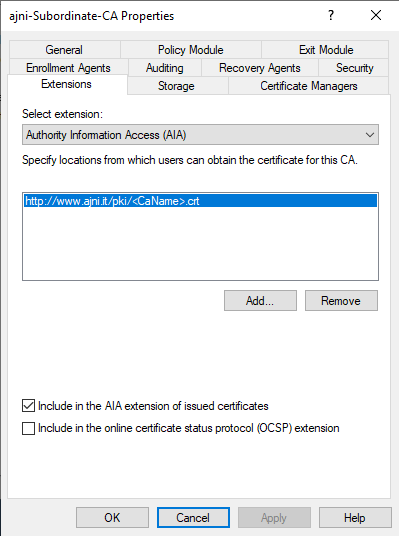
Before configuring the second server, let’s change the Authority Information Access (AIA) and the CRL Distribution Point (CDP). These must be reachable by clients at any time. Open the properties and head to extensions. Remove all the distribution points on the CDP and create these ones (I am not sure if IDP is needed, please let me know):
Change the validity period of the Subordinate CA certificate we are just going to issue and the CDP (5 years for the Subordinate CA and one year for the CDP):
Now let’s install and configure the second online CA server. The feature installation wizard is the same as on the first server. The configuration is slightly different.
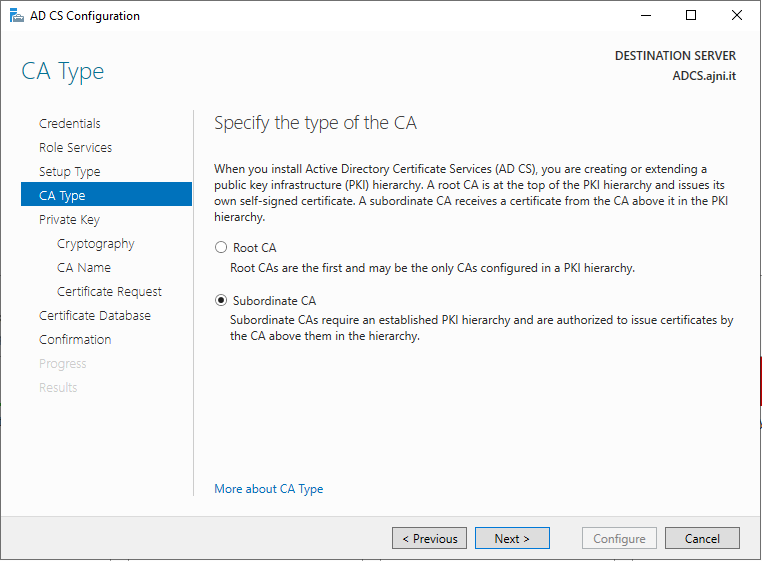
Like previously mentioned, we are using an Enterprise Subordinate CA.
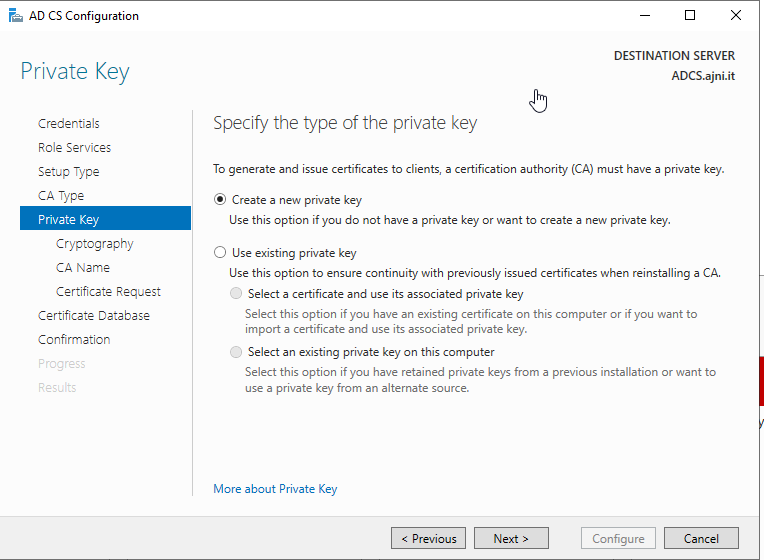
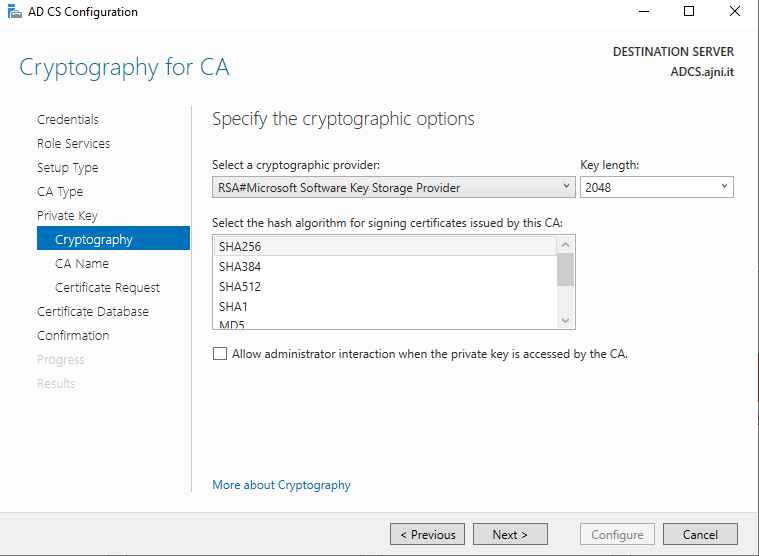
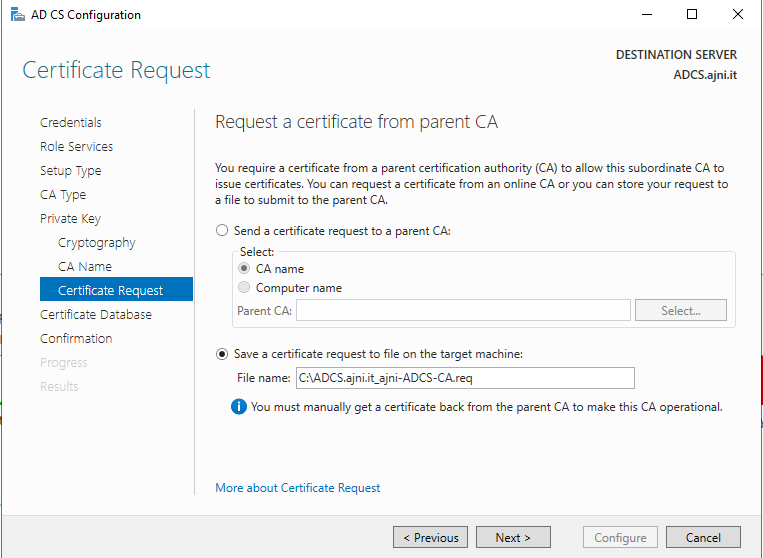
We are creating a new key. The hash algorithm is also SHA256 with a key size of 2048.
The certificate request will be uploaded to first server and digitally signed by the offline Root CA.
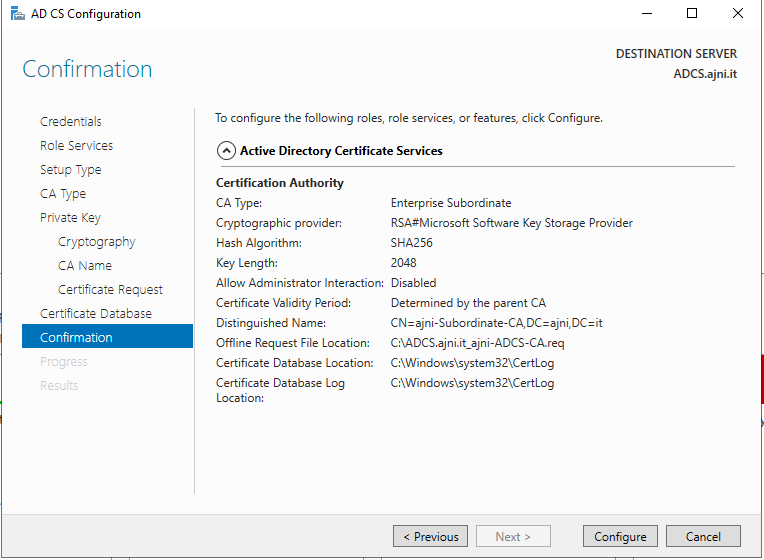
Here is once again the summary of all configured settings.
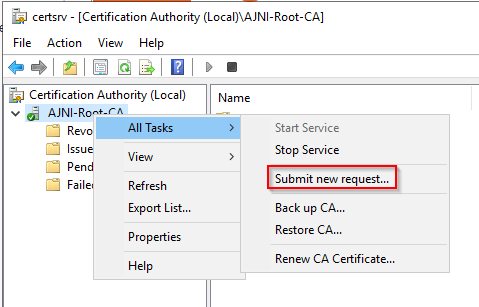
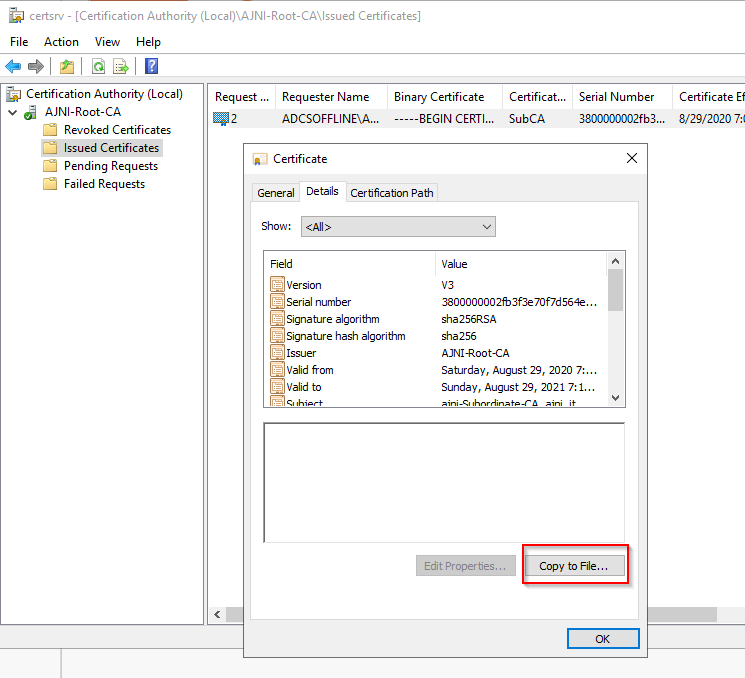
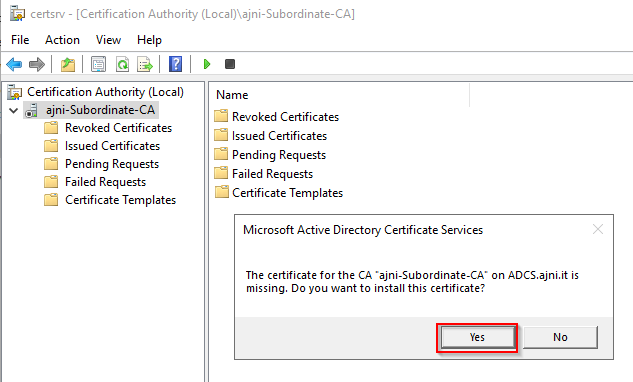
Now upload the certificate request file to the first CA. Open the Certification Authority MMC on the first server and submit a new request.
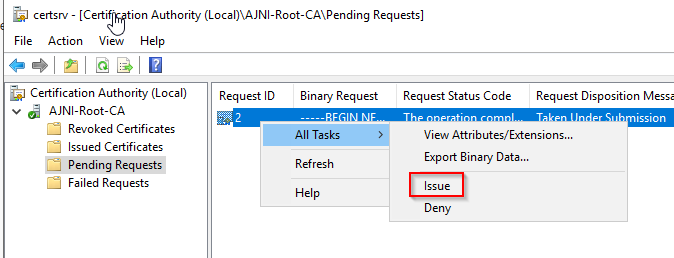
Under Pending Request you should see your request (it might take a few seconds). Here you can issue the certificate.
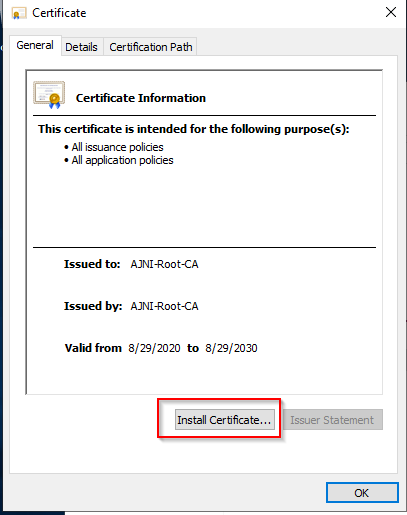
Save the signed certificate to a file as a DER format. Also, copy the Root certificate to the second server and install it in the local certificate store.
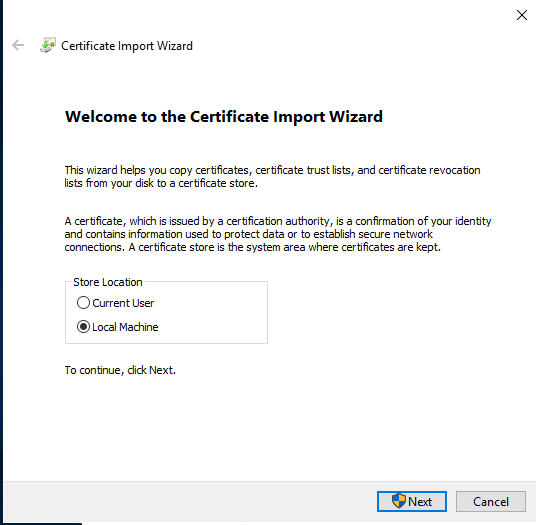
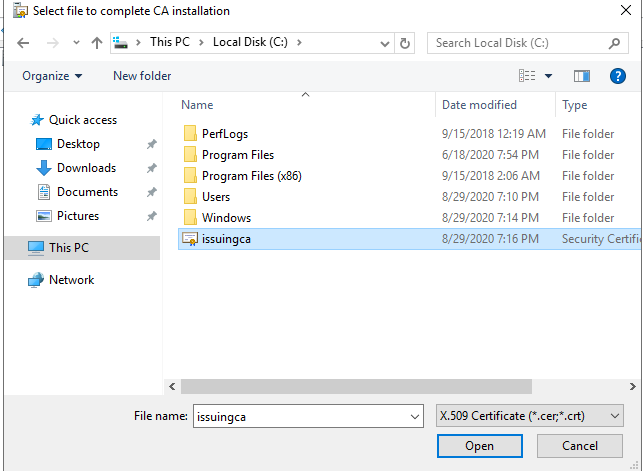
On the online CA, start the ADCS service and install the signed certificate from the offline CA.
Select the previously saved file.
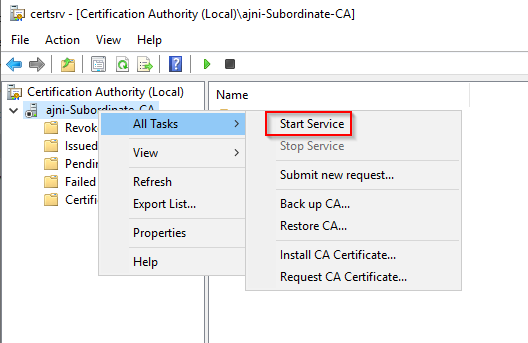
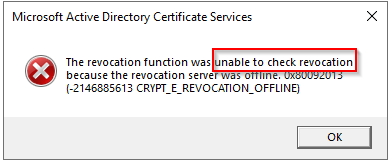
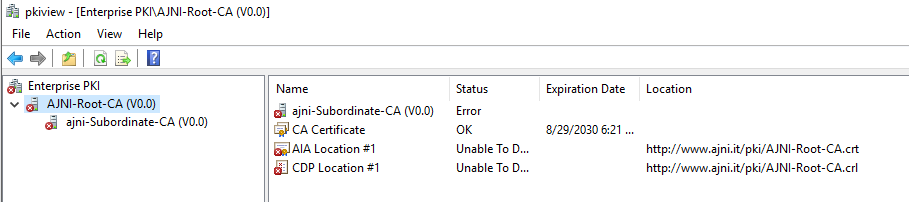
You will probably get an error when attempting to start the service because the CDP is not reachable (http://www.ajni.it/pki/…). With pkiview.msc, you can check if the distribution point are reachable and up-to-date:
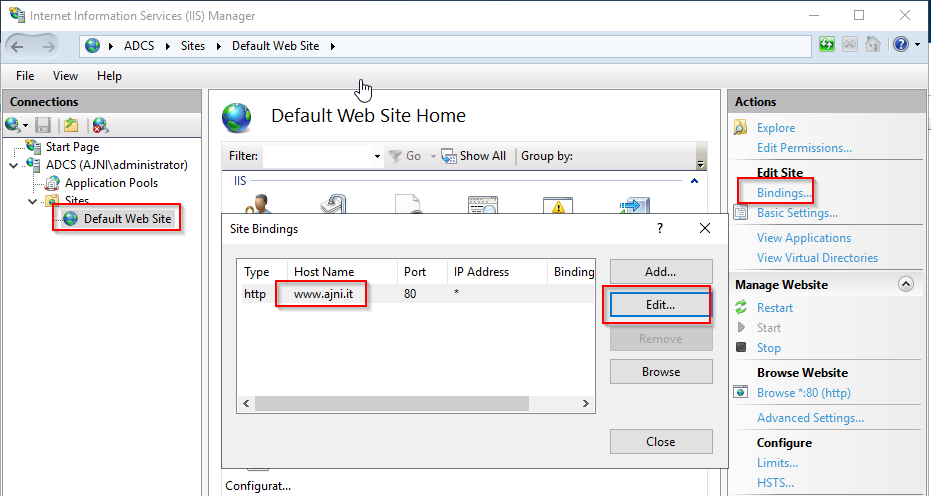
Now you will need a webserver where these files are going to be hosted. I will install IIS on the same server, but it is highly recommended to host it on a separate server.
Change IIS configuration to respond to requests with the DNS name www.ajni.it:
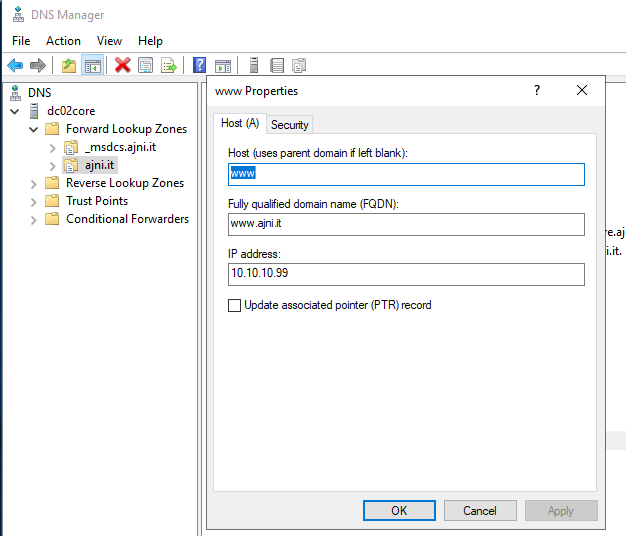
Create a DNS entry pointing to the server:
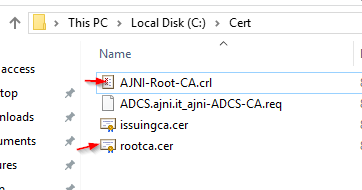
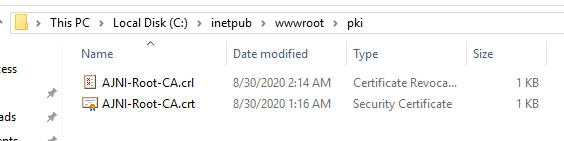
Create the CRL file on the offline Root CA and copy them to the IIS root folder (in my case it’s C:\inetpub\wwwroot\pki):
The file will be created under C:\cert. We’ll also need the Root CA file. The file name needs to be Ajni-Root-CA.crt though.
Here the file inside the IIS folder:
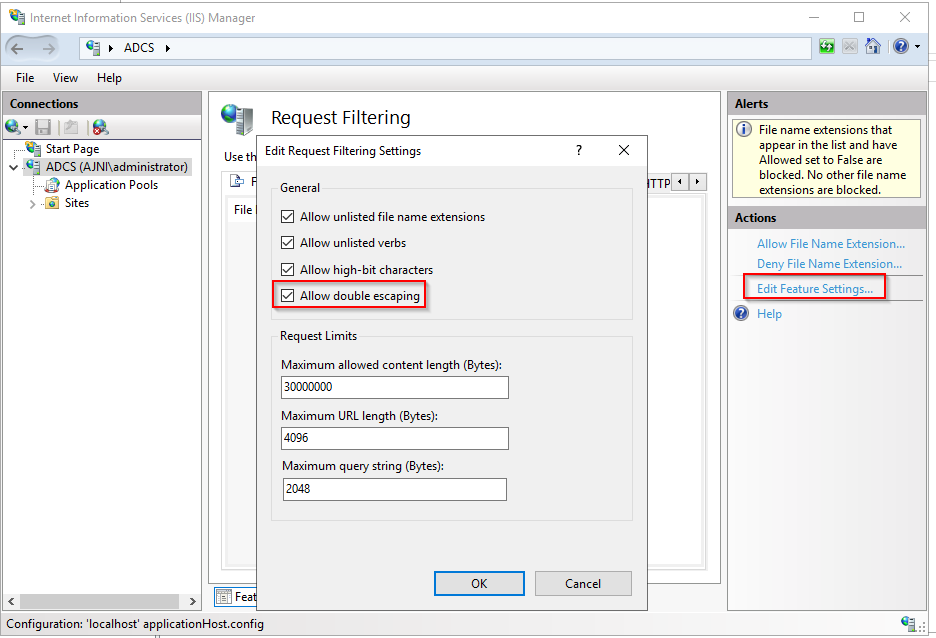
On pkiview.msc, everything should be green on the Ajni-Root-CA. When dealing with Delta CRL, IIS might block downloads because of double escaping. To solve that allow double escaping on IIS under Request Filtering:
Now that the CDP is reachable, the Subordinate CA can be started without any issues. Like on the Root CA, we have to change CDP and AIA locations:
With the above configuration, CRL and delta CRL will be automatically published to the IIS root folder.
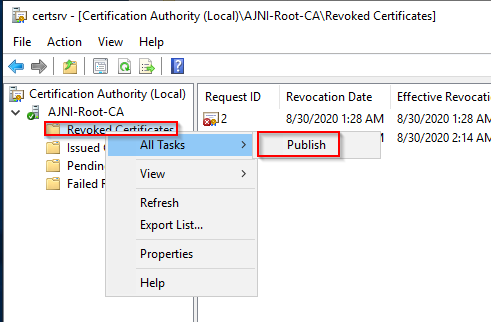
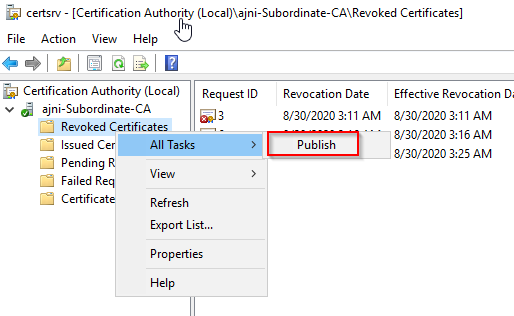
Publish the first CRL manually (you need to revoke one certificate, otherwise, the list will not be created. Do that through certlm.msc). Afterward, everything should be green in pkiview.msc.
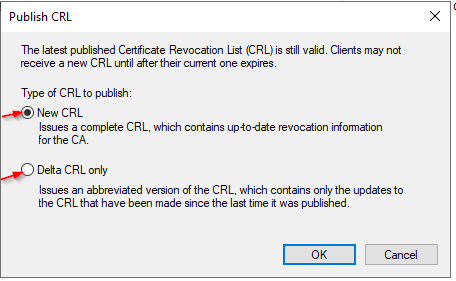
Publish both CRL and Delta CRL.
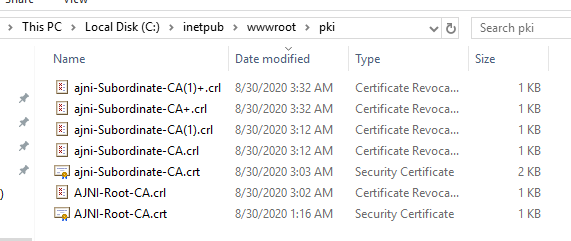
The files should be created inside C:\inetpub\wwwroot\pki. The Subordinate CA certificate has to be copied manually and named properly. You can ignore the fact that I have 2 Subordinate CA certificates. You should only see one.
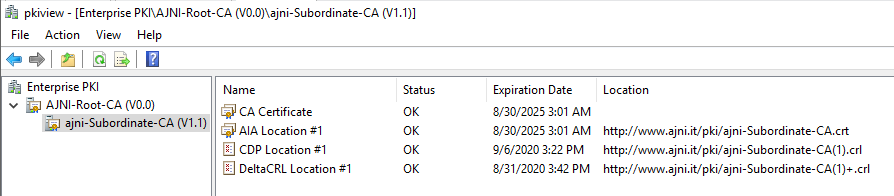
Pkiview.msc is also happy:
After everything is set, you can shut down the offline CA. You only have to start it once a year when publishing the CRL.
At last, publish the Root certificate in Active Directory with certutil. This can be also achieved with GPO.
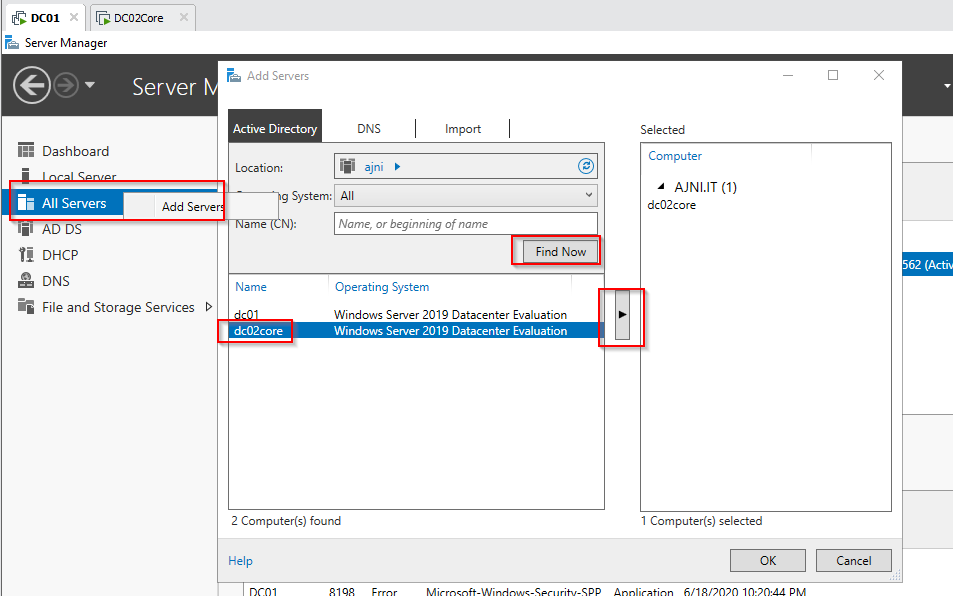
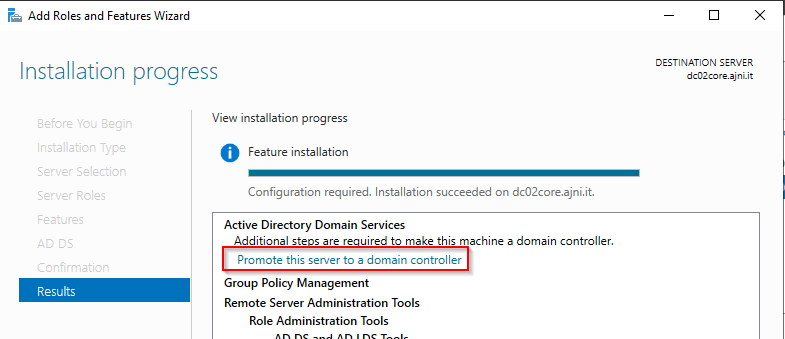
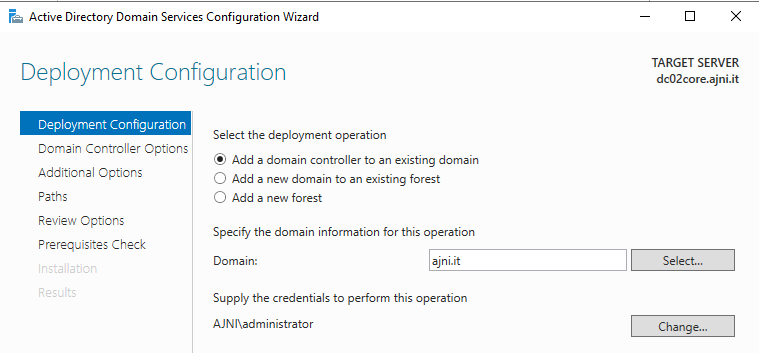
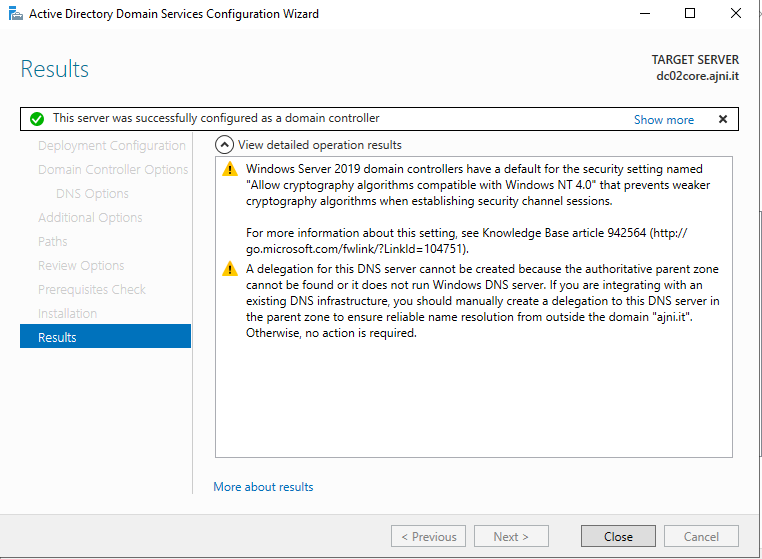
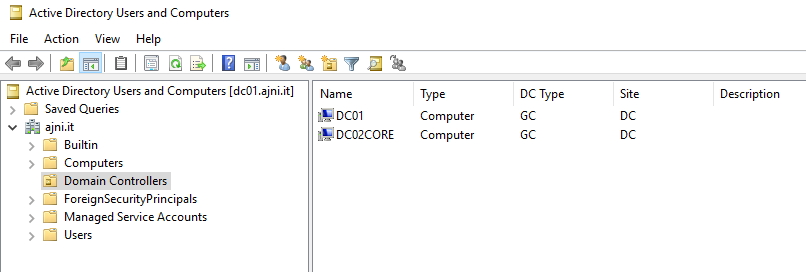
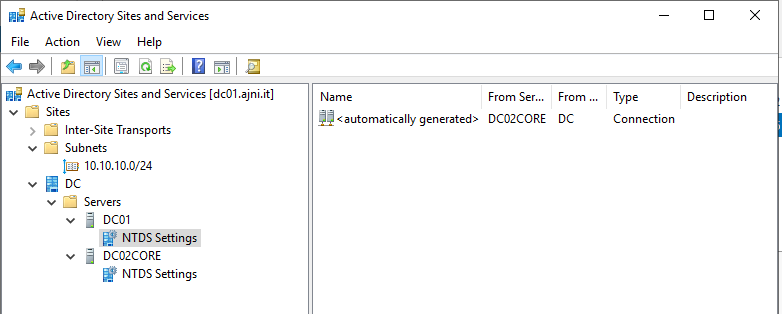
Server Core Edition is very lightweight, needs less Windows Updates, less disk space, and should be used whenever possible. Basic features like AD DS, DNS, DHCP, or IIS are supported on Server Core. Administering is also very easy once it is a member of the domain because it can be added to Server Manager on a server with GUI. We are installing AD DS in this article.
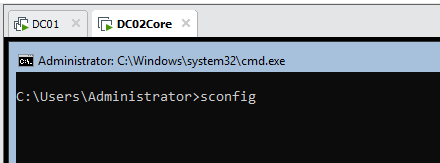
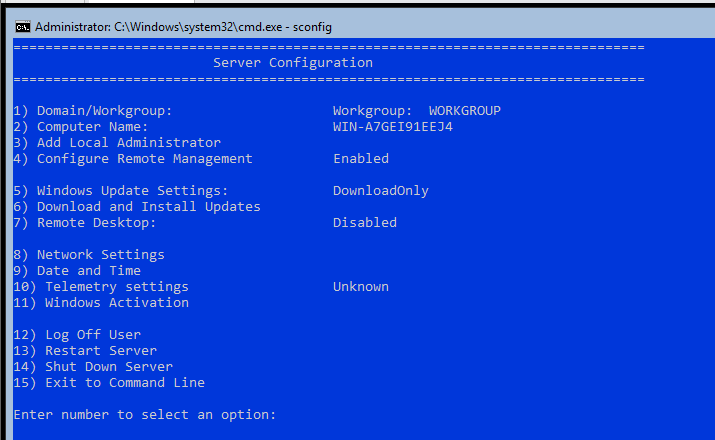
You can relatively easily change system settings on Server Core with the sconfig cmd tool.
sconfig
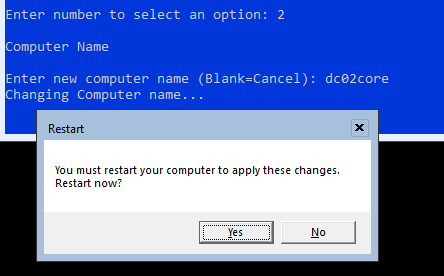
First change the server’s name (Option 2).
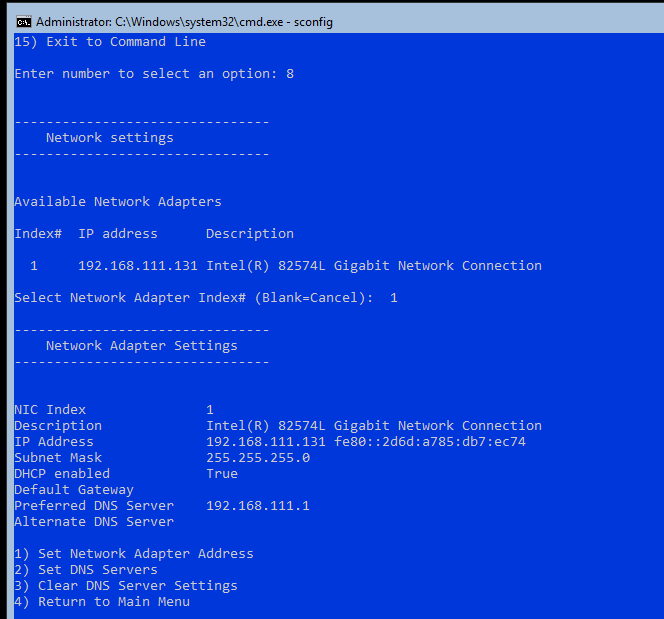
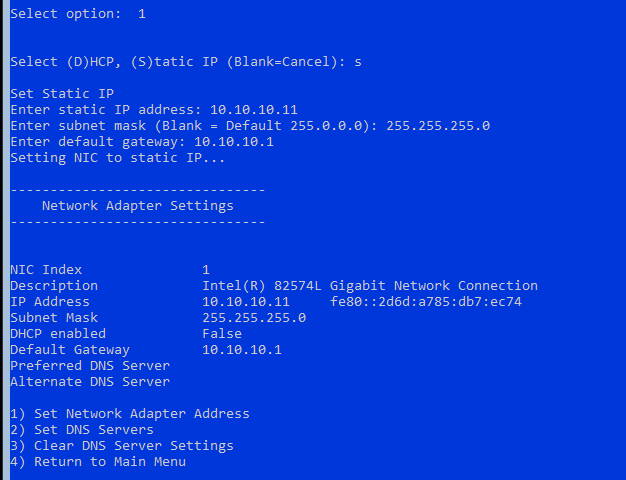
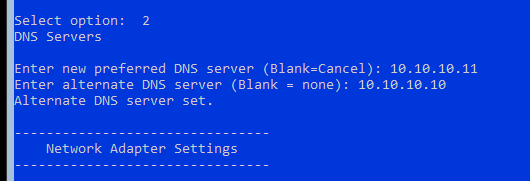
Afterwards set the IP address to a static one along with DNS servers (option 8).
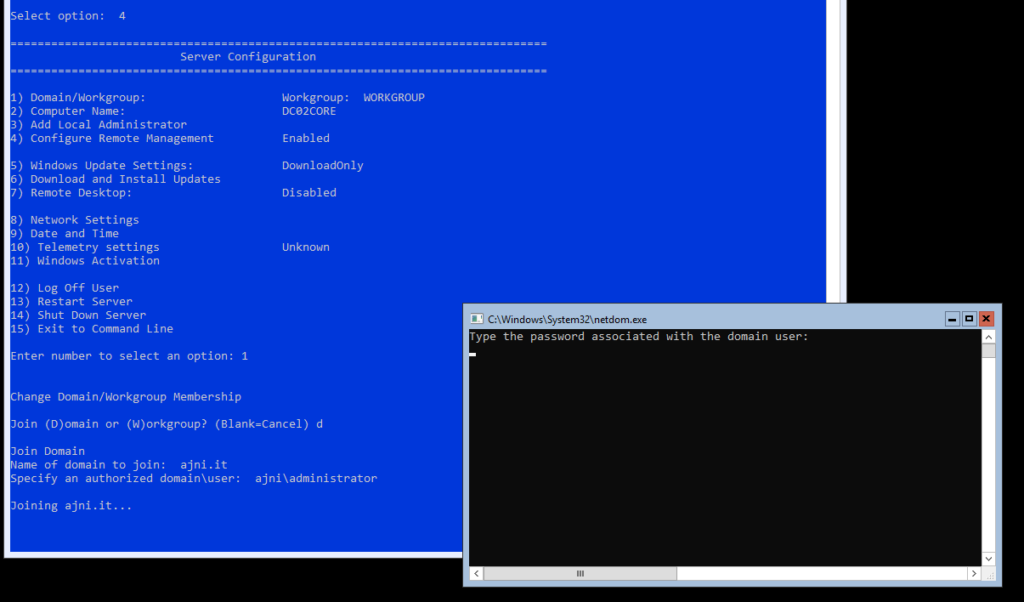
Return to the main menu and perform the Domain Join (option 1).
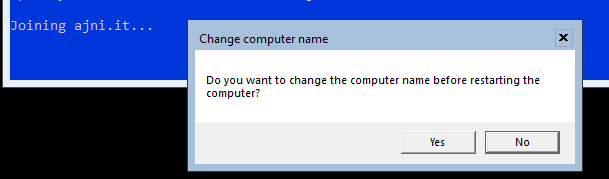
We don’t need to change the computer name. The server will be then rebooted.
From now on, the fastest and simplest approach of administering your Windows Server Core is through Server Manager on a Server with GUI.
Here is a quick way to find inactive AD Users in your environment. Get-ADUser ist the cmdlet we are going to use.
We are getting all users from the highest OU (domain.com) and using the Property LastLogonDate, which will not be returned if not specified in the -Properties parameter. After that a Where statement is going to show users that haven’t logged in since 90 days or more.