As a normal user without admin rights, you can theoretically kill the Windows Guest OS (for example if you are connected through Citrix or Remote Desktop Services) by safely removing the VMXNET3 adapter on the bottom right. This is very bad and is apparently “by design”.
To hide the icon proceed as folow:
With the VM powered off, click Edit Settings > Options > General and configuration parameters. Add row and then type devices.hotplug. As a value insert FALSE. You can then power on your machine.
Updating VMware Tools on a Citrix Provisioning Master Image used to be very time consuming. Nowadays it has gotten a little better, but you still have to do a few extra steps because of the vmxnet3 network adapter. Here are the steps that I took when upgrading to the newest Vmware Tools that came with ESXi 8.0 update.
Start the Master VM
Once booted up, add a new E1000E network card
Check in device manager if the E1000E/Intel network card can be seen
Shutdown VM
In the Provisioning console, change the mac address of the target device to that of the E1000E network card
Disconnect vmxnet3 NIC (uncheck connect on power on)
Start Master VM. Beware that the E1000E NIC is emulated and is painfully slow. I had instances where it took 15 minutes to boot up!
Once booted up, start VMware Tools upgrade through Vcenter (interactive)
Visual C++ Redistributable might be installed, you might need to reboot
Let boot
Start Vmware Tools upgrade again (interactive)
Run the installer
Shutdown VM
Disconnect E1000E NIC (uncheck connect on power on)
Connect vmxnet3 NIC (check connect on power on)
Boot
Once booted, fully remove E1000E fully
In device manager, show hidden devices and delete the greyed out Intel NIC
This time there are no references. I had to try and error myself.
If you have the misfortune of having to troubleshoot and repair boot issues on a virtual machine after a physical host crash, these two commands might help you.
First of all, try to get into the advanced settings on boot (it should be the F11 key), or after a while Windows (Server or 10/11) might automatically go into the menu when it cannot boot from disk. Alternatively a Windows ISO image can be used.
Once in the advanced settings, run the good old checkdisk command:
chkdsk /f C:
After completion, restart the VM and check if you are able to boot. If the issue persists, try restoring the registry database (once again through the advanced settings or a Windows ISO). A scheduled task regularly backs up the registry and puts it the folder C:\Windows\System32\config\Regbak.
Restart the VM and check if you are able to boot into Windows. If you still have issues, you should consider restoring from a backup (it sucks but sometimes it is unavoidable).
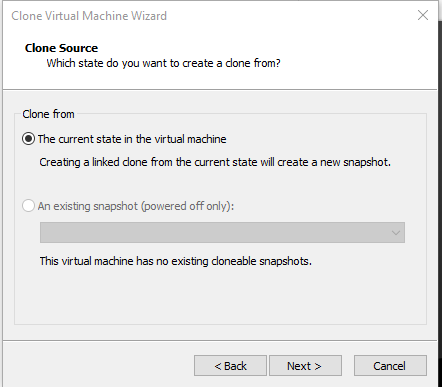
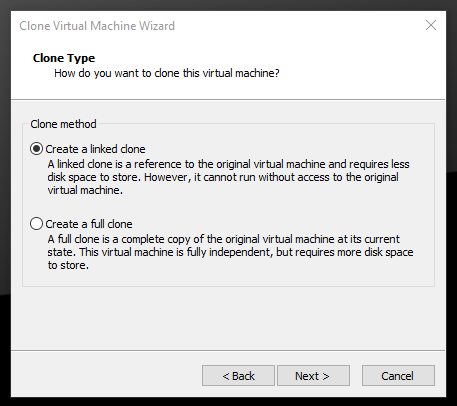
Linked Clones use a read-only disk as a reference, changes made to the VM are written into a separate writable disk. This technique allows us to save disk space and create a lot of VMs. Changes, at least in the beginning after the OS installation, are very small.
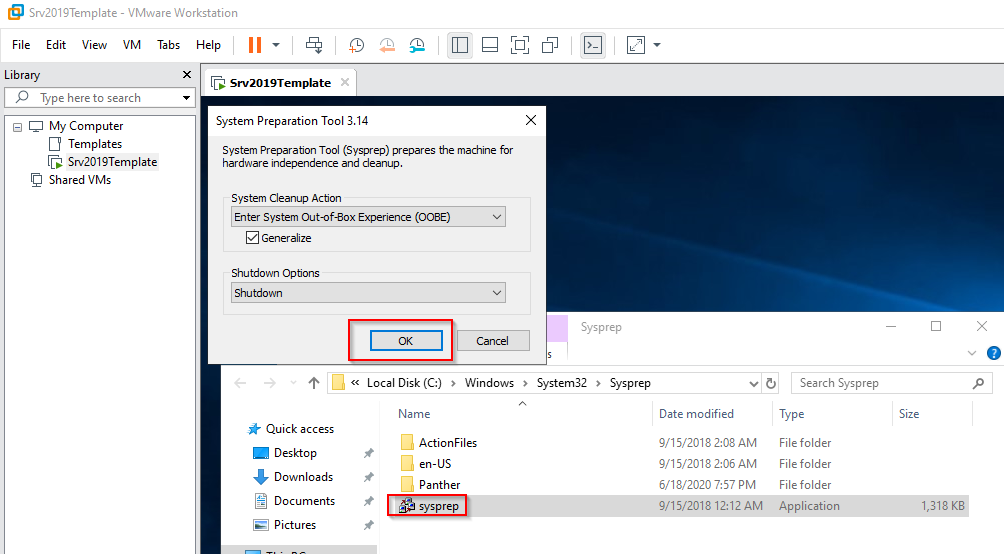
Install Windows 10 or Windows Server along with VMware Tools and then Sysprep your VM.
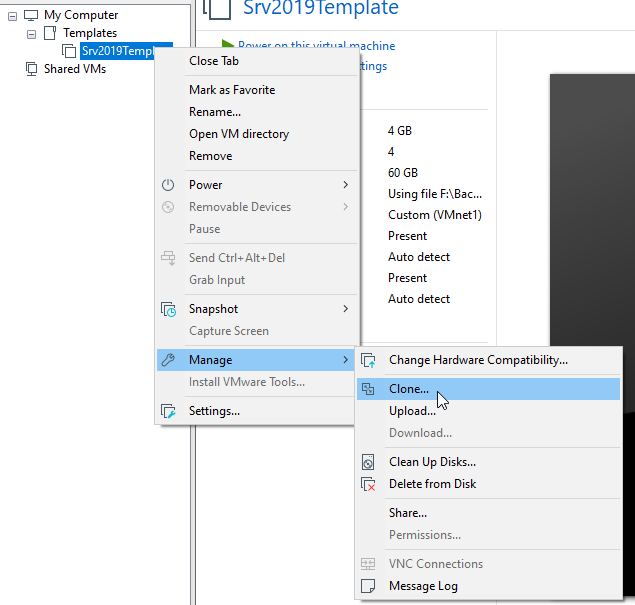
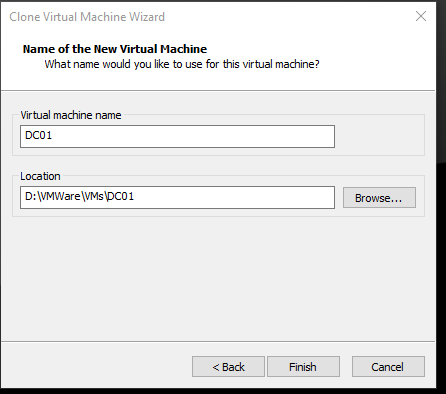
Now the template can be “cloned”
In VMware, a Differencing Disk is called Linked Clone. Just like in a snapshot, a linked clone uses a base read-only disk and saves changes into second, writable disk.
Now a name for the new VM can be inserted.
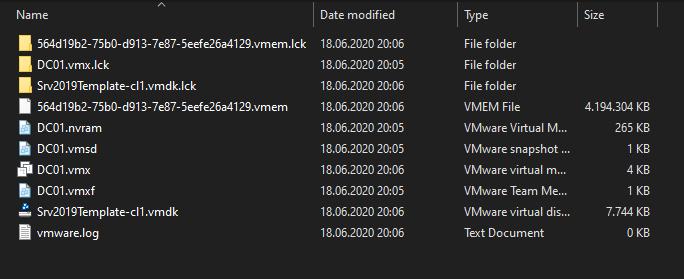
After booting up the new VM, we can see that the writable disk only consumes 7MB. 4GB are used for the memory state.
This feature is awesome for home labs. You can create multiple VMs off of that single base disk. In a lab, changes are usually very small, so you can save a ton of space using this method. I would not recommend updating your system through Windows Updates or enabling Bitlocker.
If for some reason the base disk is corrupt or lost though, every VM will be affected.